These chocolate peppermint marble cookies will be the most popular cookie at your next Christmas party. They have a gorgeous marbled design with clean swirls that are unique to each slice, and they’re filled with a rich chocolate and peppermint flavor.
The marbled cookie is tender and buttery with a delicate crumb. Best of all, they're super flexible. Make the peppermint rich cookies around your busy holiday schedule and don't stress-- they'll always come out beautiful and delicious!
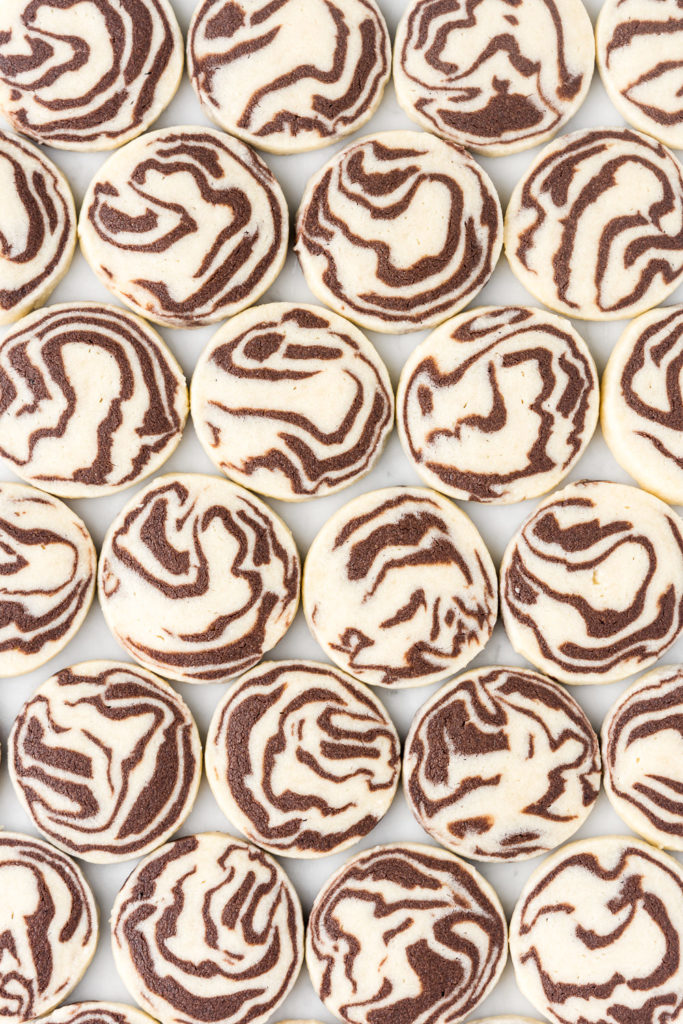
why are they called icebox cookies?
The term icebox cookie is really broad, actually. Any dough that you shape into a log and then slice fits the bill! Because a refrigerator was once called an icebox, people simply called these cookies icebox cookies. It’s an old school term for slice and bake.
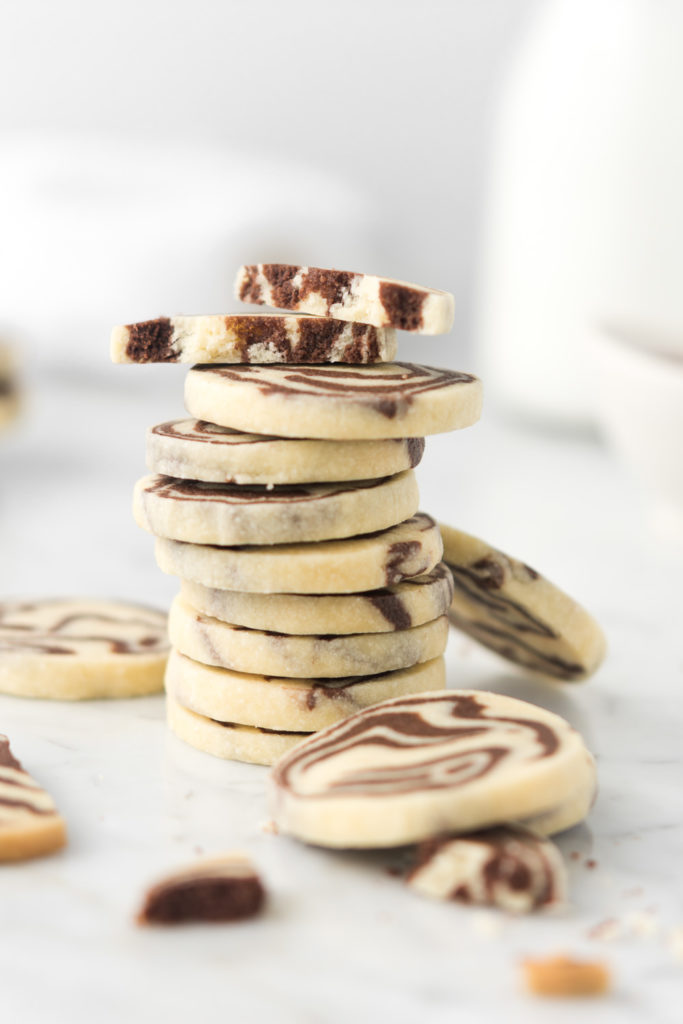
The beauty of icebox cookies is their flexibility, which is especially important during the holidays! You can make the dough several days ahead and leave it in the refrigerator until you’re ready to bake them off.
Even better, you can freeze the dough for up to 3 months. The dough only needs to be thawed enough to make slicing possible. And you can bake the cookies straight from the freezer, just tack on a few extra minutes in the oven and pull them out when they start to turn golden on the edges.
how to marble cookies:
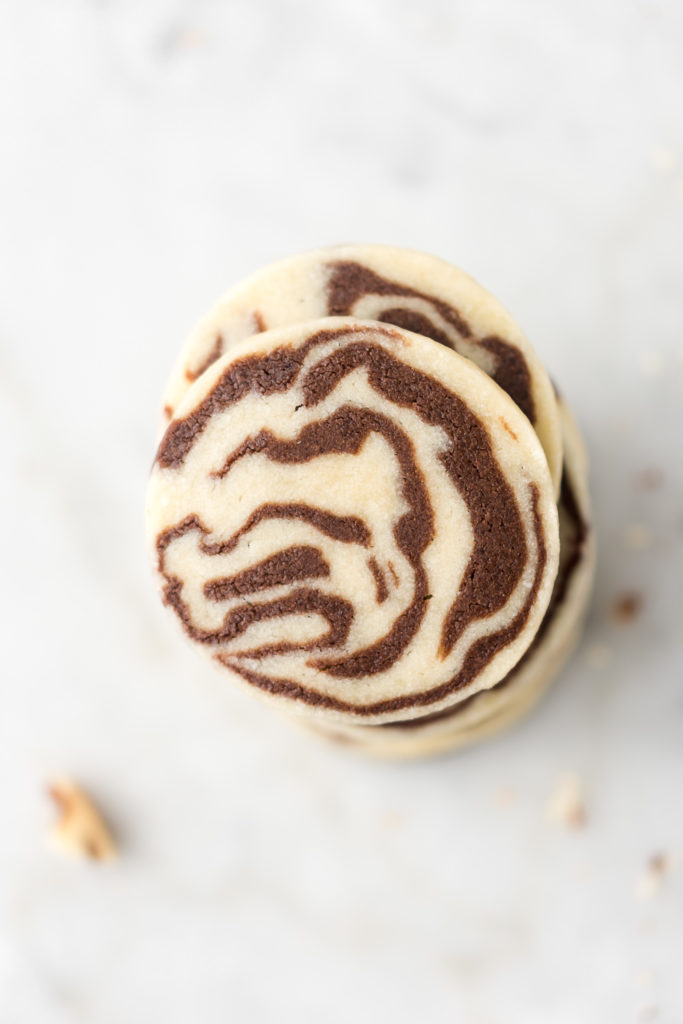
The secret to getting a really good marbled cookie is to go crazy with the folding and twisting. The more randomly you manipulate the dough, the more wild the marbled design will be.
I’ve tested this technique extensively with model clay, and then a ton of times with the actual cookie dough. Through all of these marbling tests, I’ve learned several key techniques that will help you achieve a gorgeous marbled cookie, every time. Here they are:
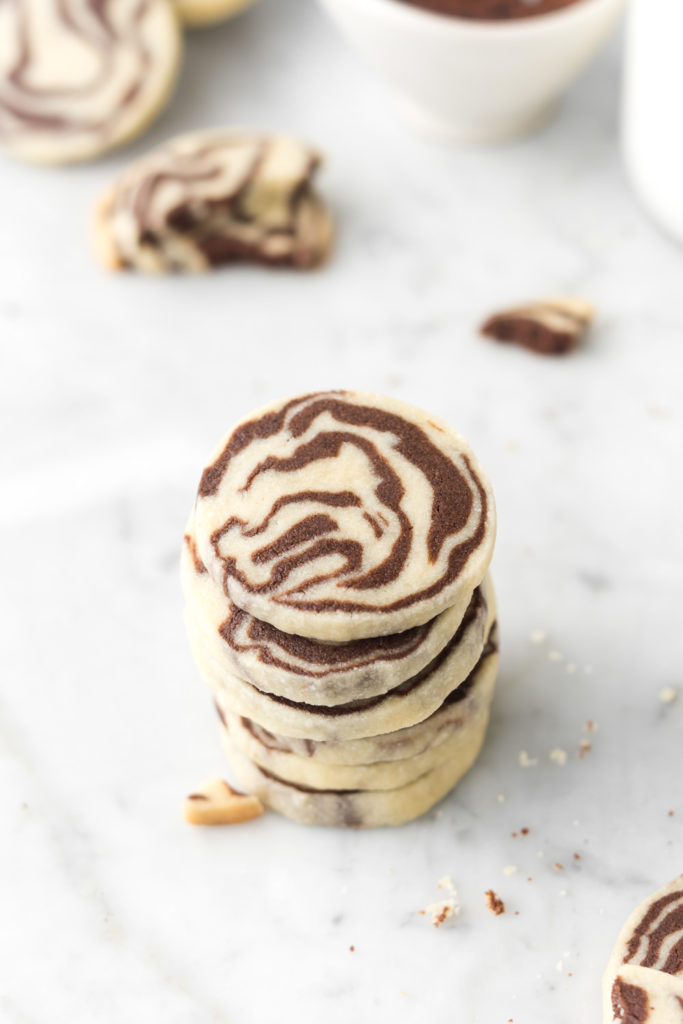
- Start with different quantities and thicknesses of vanilla and chocolate dough to add interest to the design
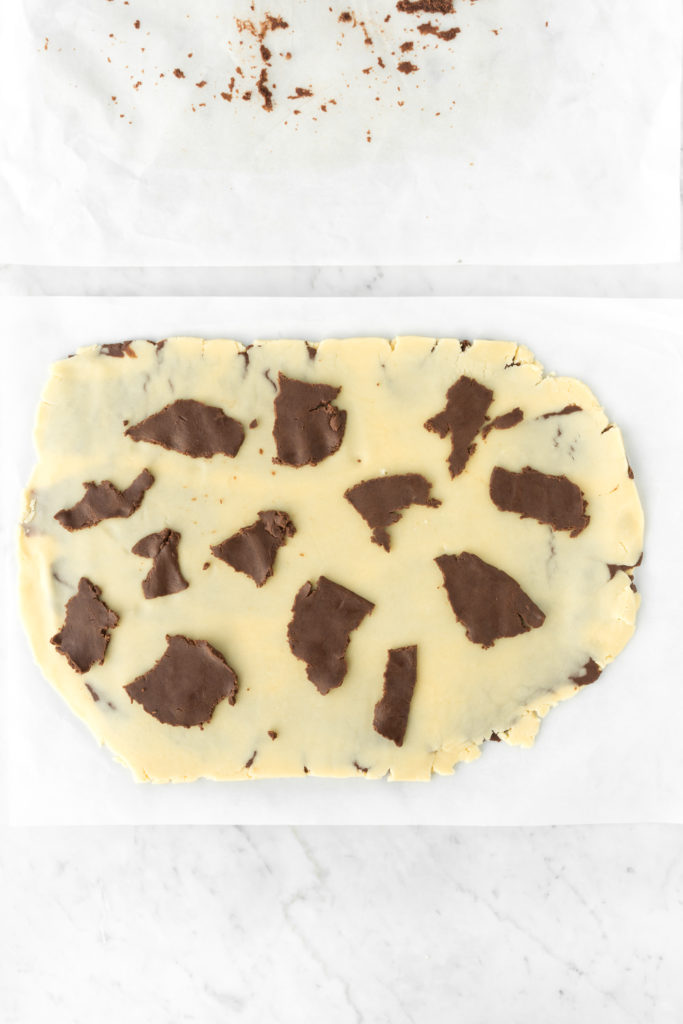
- Place the chocolate pieces on the vanilla dough in a random, patchwork manner to give each cookie a unique marbled look
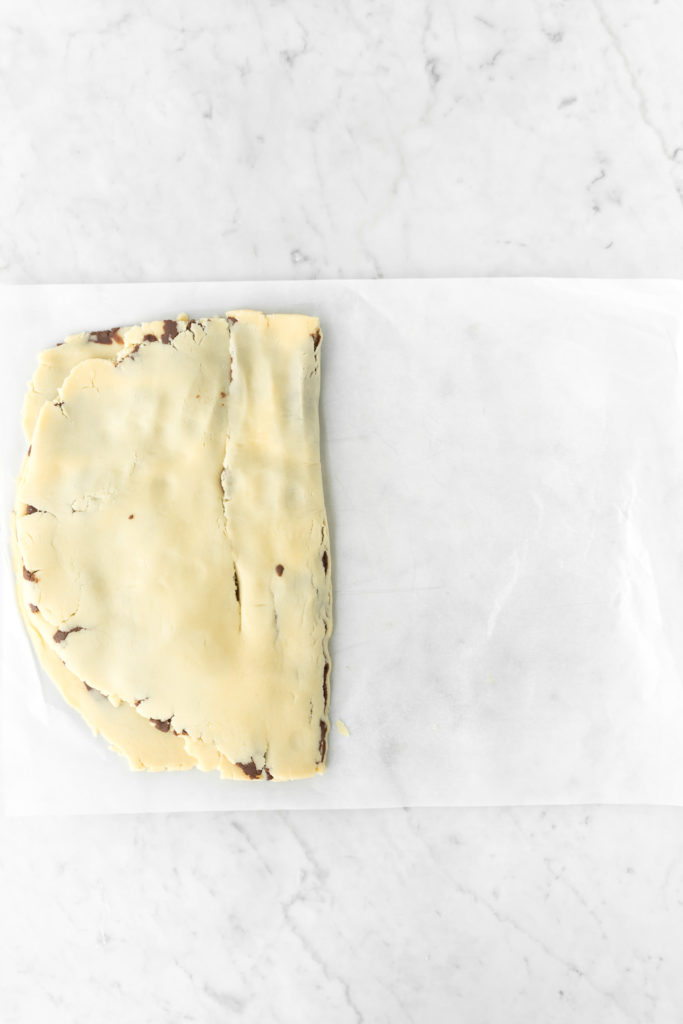
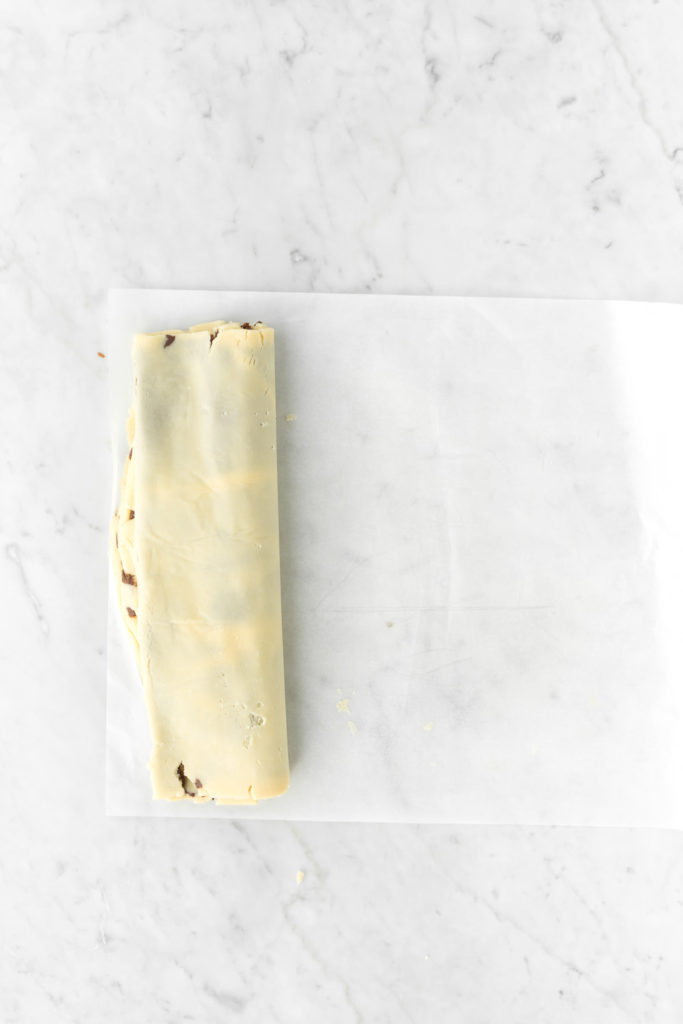
- Fold the dough exactly four times. Less folds with give you a boring design with thick streaks, while more folds will make the marbling look muddy.
- Twist the folded dough like you’re wringing out a towel. This will add fun swirls.
- Refrigerate the dough as needed to keep it cool. Too warm and it’ll be sticky, squishy and hard to work with, but too cold and it will be difficult to manipulate and more prone to cracking.
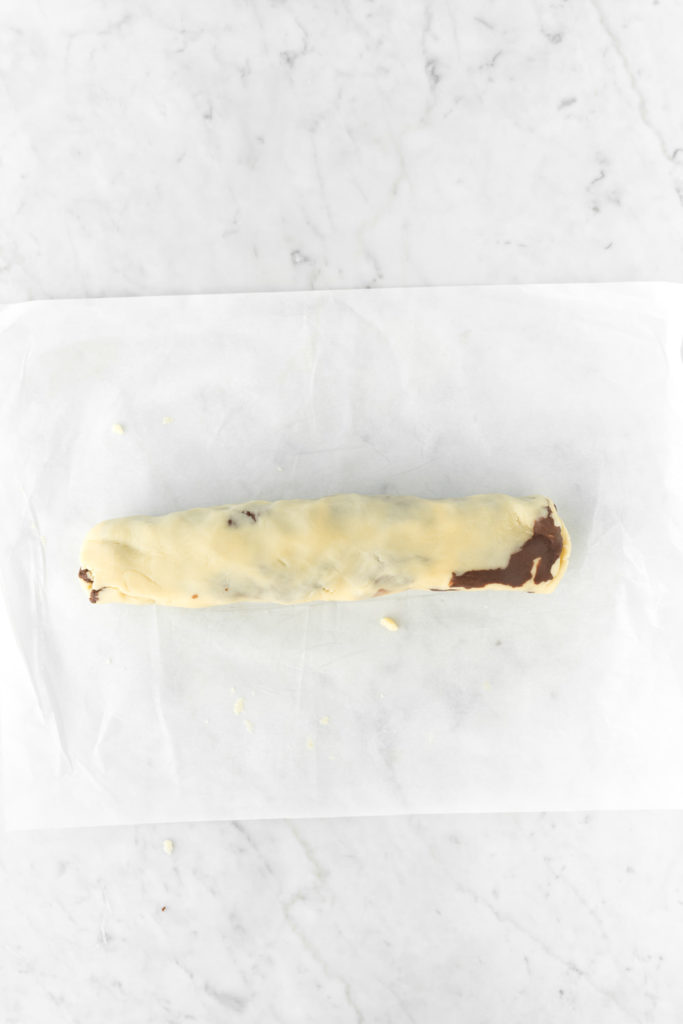
- Squeeze the final log then roll it firmly along the surface to make sure the center is solid dough, with no holes or cracks.
- Chill the log in an empty paper towel roll (cut open lengthwise). This will mold the dough into a perfect cylinder and avoid the annoying flat spot that develops in the fridge. And that, my friend, is how you make perfectly round marble cookies!
a visual guide for marbled cookies:
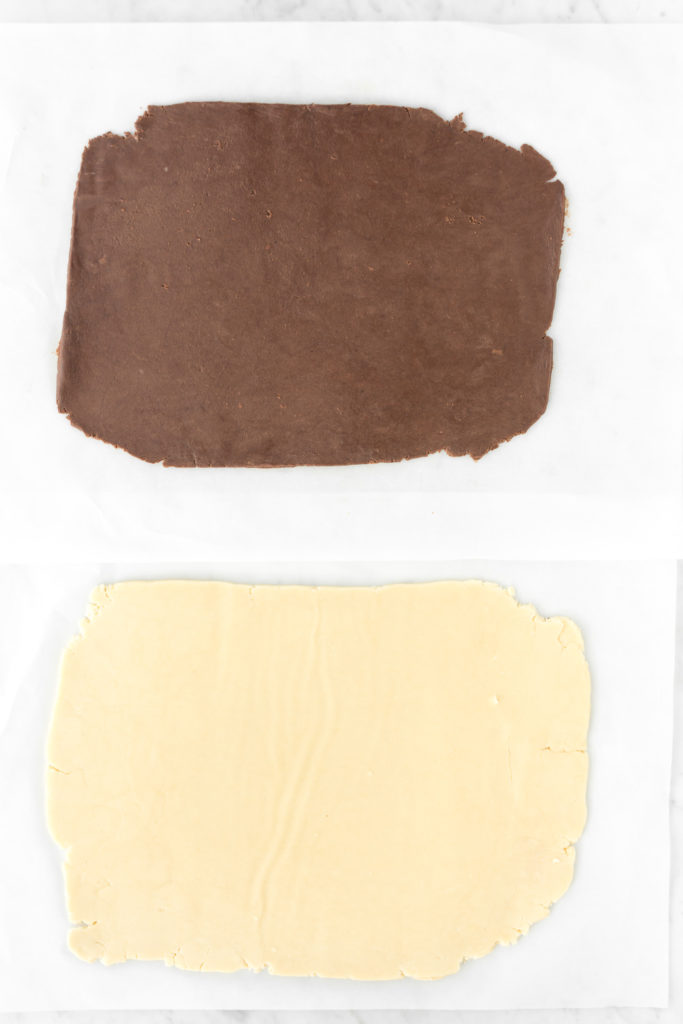
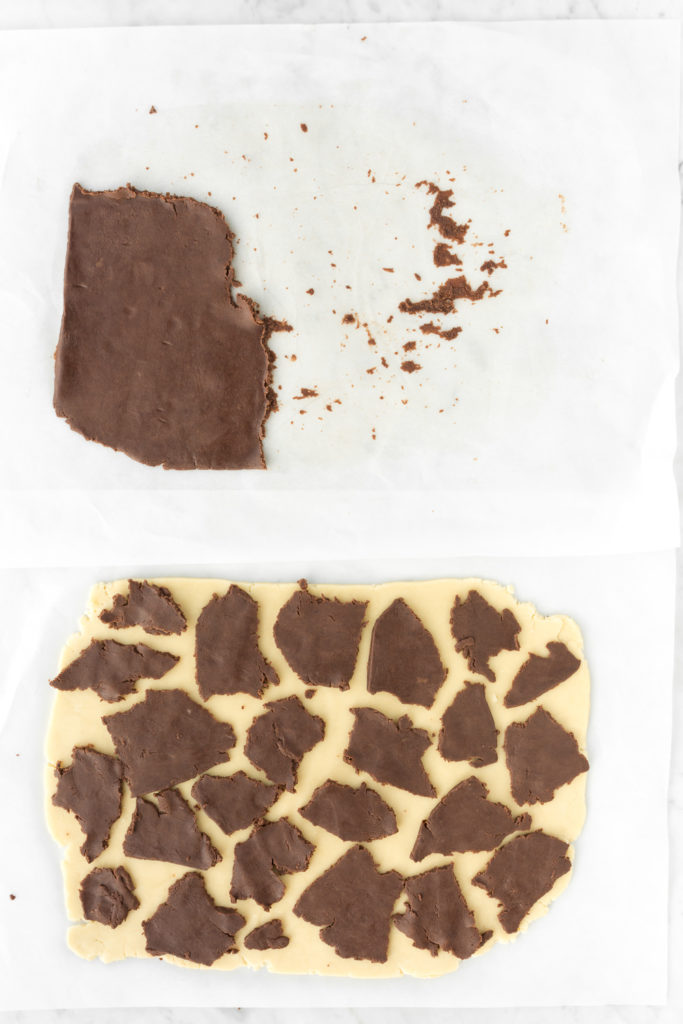
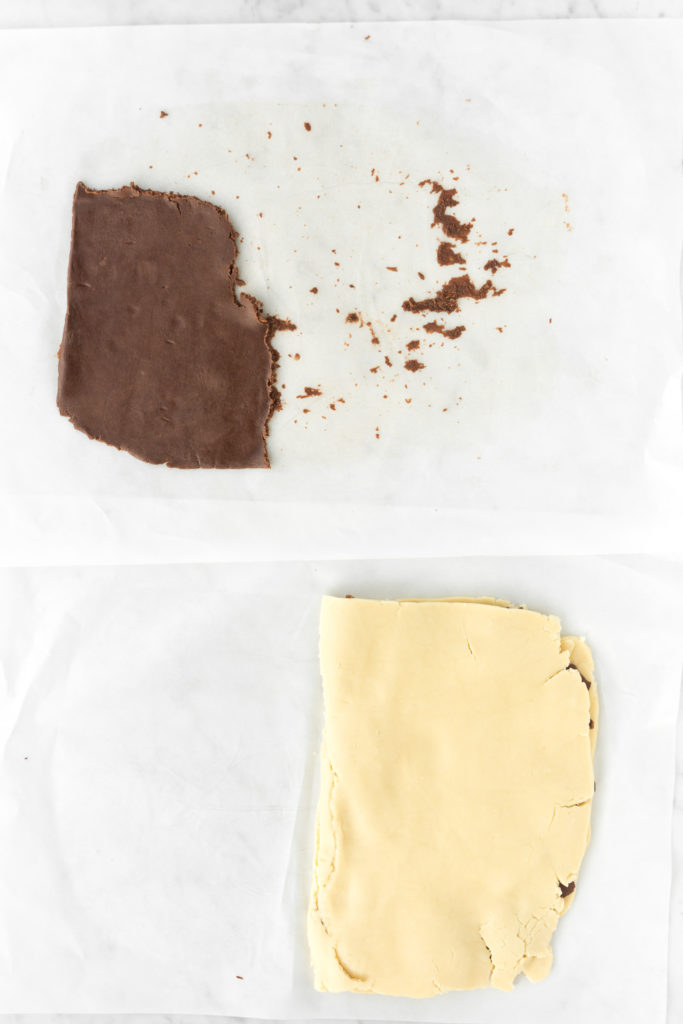
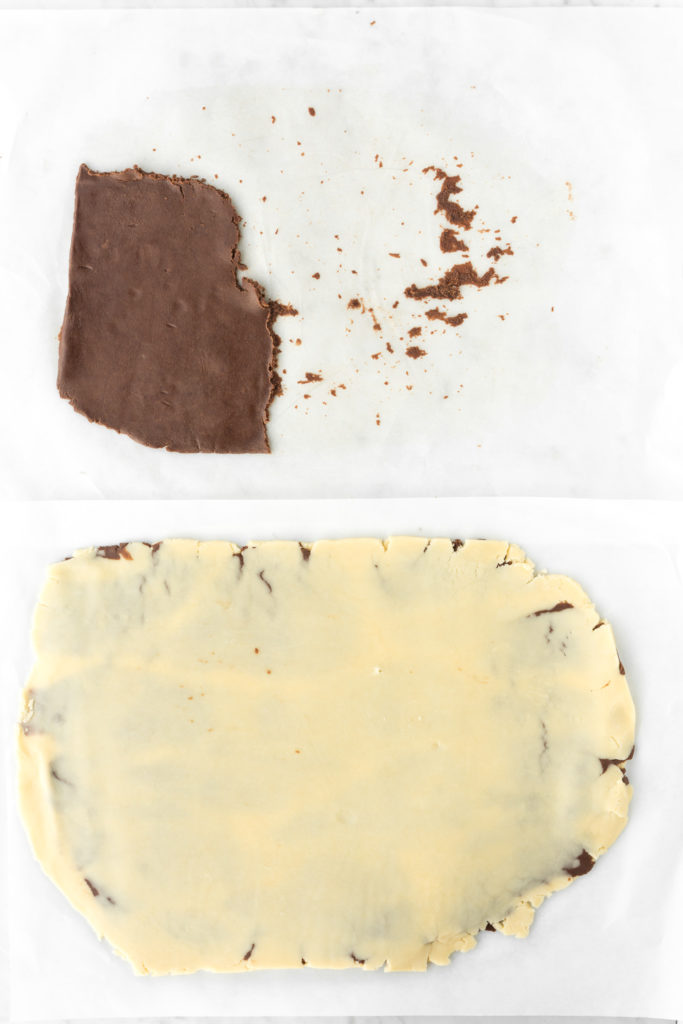
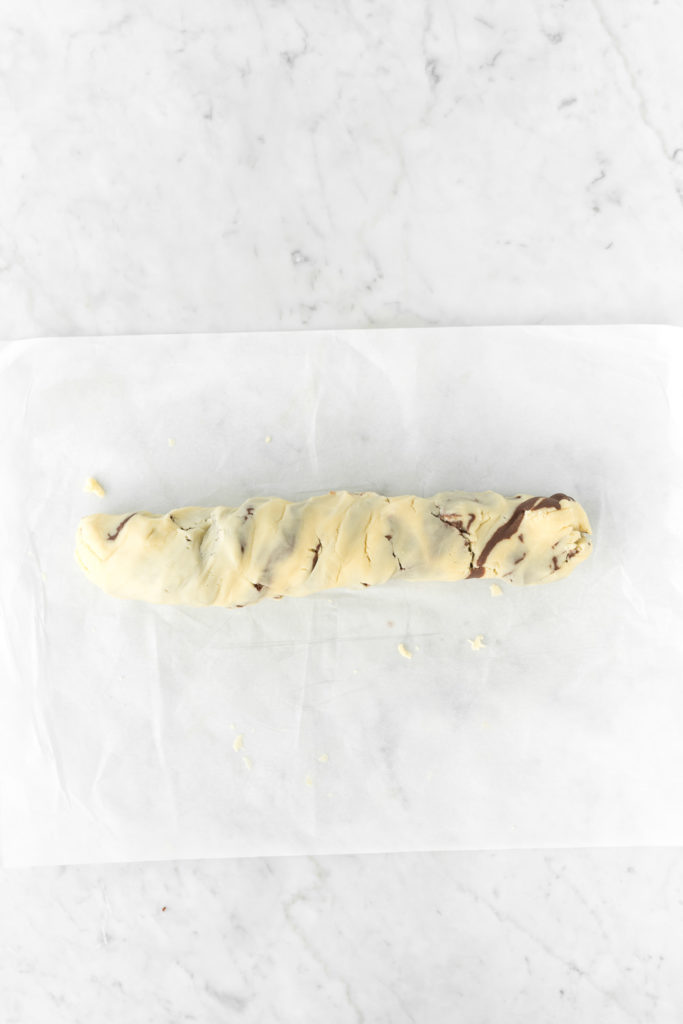
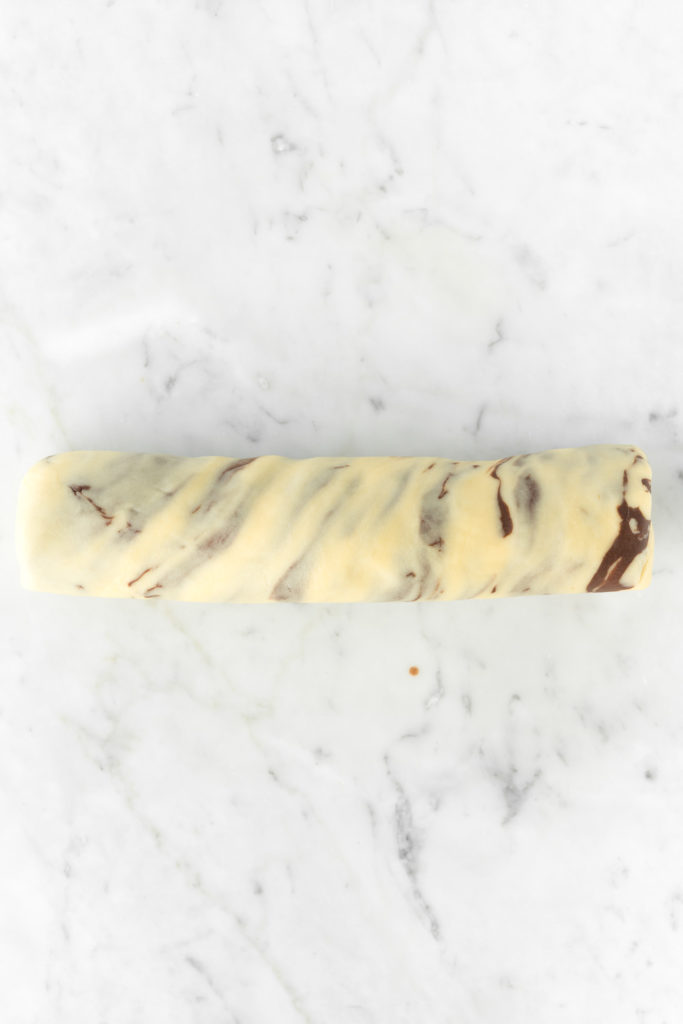
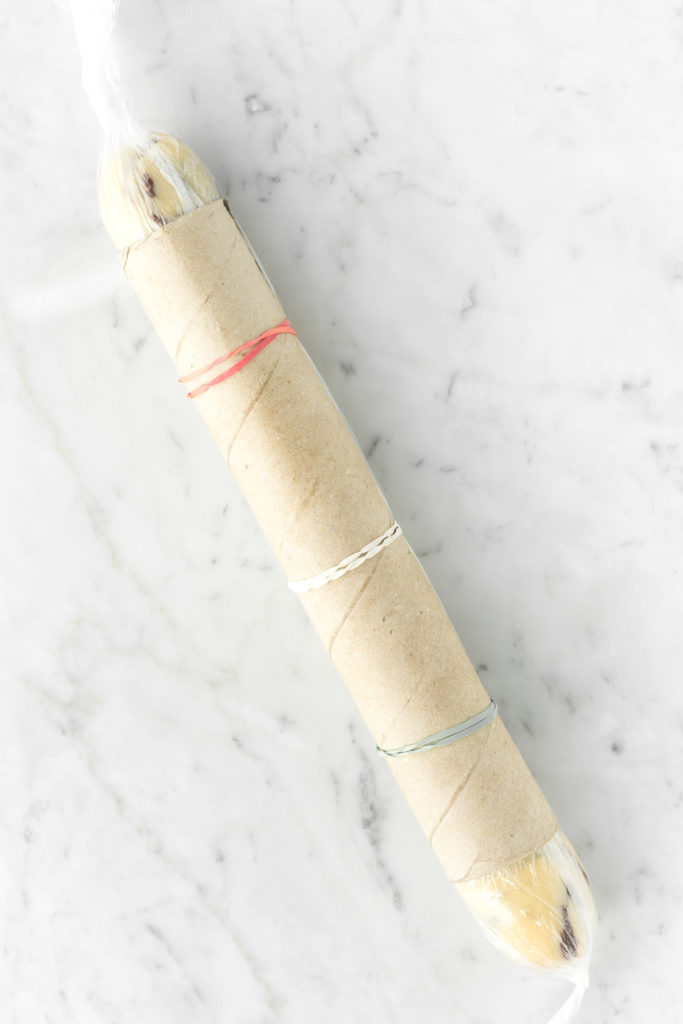
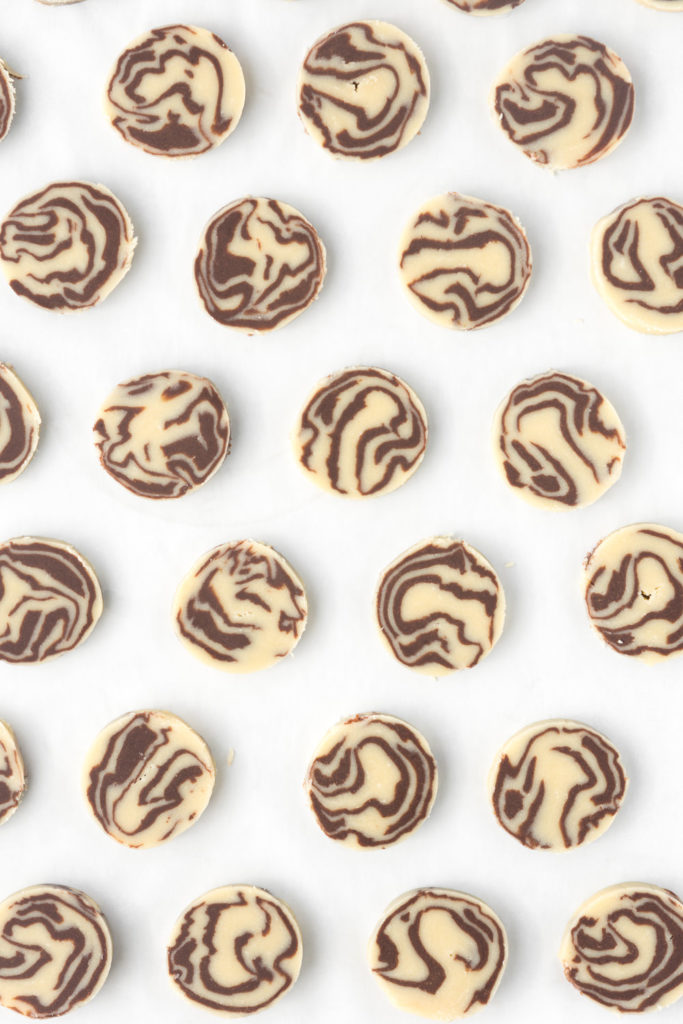
more Christmas cookie recipes to try:
- double dark chocolate salted cookies
- shortbread cookies
- chocolate shortbread cookies
- molasses crinkle cookies
- pecan shortbread cookies (perfectly buttery and crisp)
- cinnamon hazelnut meringue cookies
- double chocolate meringue cookies
- butter cookie sandwiches with chocolate hazelnut ganache
- chocolate dipped almond cookies
- traditional chocolate fudge
- salted butter spritz cookies
Watch our Christmas cookie web story here!
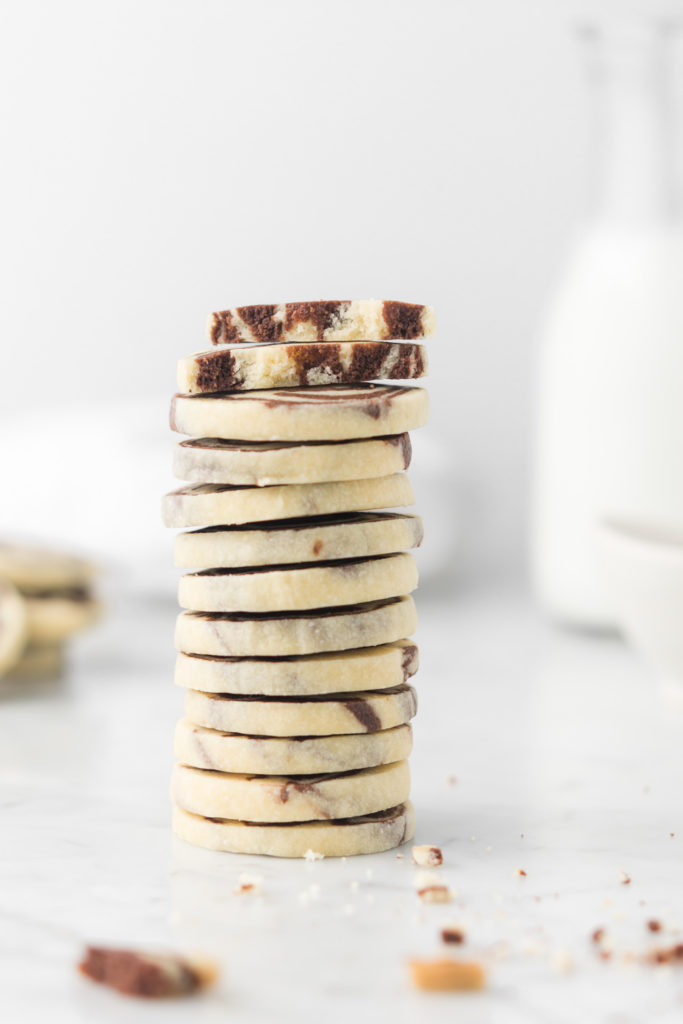
marble cookies
Gorgeous marbled chocolate peppermint icebox cookies are tender, buttery and filled with holiday flavors.
- Prep Time: 1 hour
- Cook Time: 15 minutes
- Total Time: 1 hour 15 minutes
- Yield: 40
- Category: Cookies
- Cuisine: American
Ingredients
vanilla dough
-
12 tbsp (1 ½ sticks or ¾ cup) salted butter, softened
-
½ cup powdered sugar
-
1 ½ tsp vanilla extract
-
1 ½ cup all purpose flour
chocolate peppermint dough
-
6 tbsp salted butter, softened
-
¼ cup powdered sugar
-
¾ tsp peppermint extract
-
2 tbsp cocoa powder
-
¾ cup all purpose flour
Instructions
- In the bowl of a stand mixer fitted with a paddle attachment, cream butter, powdered sugar and vanilla extract until smooth. Add flour and mix on low speed until dough begins to clump together, about 1 minute. It will be crumbly but will stick together when squeezed. Transfer vanilla dough to a work surface and shape into a 1-inch thick square disk. Wrap in plastic wrap and refrigerate dough until chilled, about 30 minutes.
-
To make the chocolate peppermint dough, cream butter, powdered sugar and peppermint extract in the same bowl (don’t worry about washing it). Add cocoa powder and flour and mix on low speed until dough begins to clump together, about 1 minute. It will be crumbly but will stick together when squeezed. Transfer chocolate peppermint dough to a work surface, shape into a 1-inch thick square disk and wrap in plastic wrap. Refrigerate until chilled, about 30 minutes.
-
Roll out vanilla dough in between two pieces of parchment paper to form a 9-by-12 inch rectangle. Set aside and repeat with chocolate peppermint dough (it will be much thinner). Tear off random, irregular sized pieces of chocolate dough and place them on top of vanilla with small gaps between each piece; it will look like the spots of a giraffe. When the surface is covered (you won’t use all of the chocolate dough yet), fold the dough in half lengthwise. Roll out again to a rough 9-by-12 inch rectangle, tear remaining chocolate dough into irregular shapes and place randomly on the surface. Fold dough in half lengthwise, press to flatten, then fold in half again to form a rough log. Twist the log as if to ring out a towel, squishing the dough together if it starts to crack. The more twisting you do, the more marbled the cookies will be. Squeeze the log to make sure there are no cracks in the center, then roll the dough firmly on the counter until smooth. Wrap in plastic wrap. If desired, cut a lengthwise slit in an empty paper towel roll, place the log inside and secure with a few rubber bands. This will keep the log round while it chills. Refrigerate for at least 30 minutes, until very firm.
-
When ready to bake the cookies, preheat oven to 350°F.
-
Slice the dough into ¼” thick slices and arrange on a parchment paper lined baking sheet. The cookies don’t spread much and can be fairly close together. Bake for 16- 20 minutes, depending on the thickness, or until the vanilla dough is slightly golden. Let sit on sheet for a few minutes before transferring to a rack to cool completely.
Notes
- use high quality cocoa powder for the richest chocolate flavor
Nutrition
- Serving Size: 1
- Calories: 81
- Sugar: 2.1g
- Sodium: 41mg
- Fat: 5.3g
- Saturated Fat: 3.3g
- Unsaturated Fat: 1.5g
- Trans Fat: 0.2g
- Carbohydrates: 7.6g
- Fiber: 0.2g
- Protein: 0.8g
- Cholesterol: 14mg
Angela says
This recipe did not work at all. The cookies need much more flour to the amount of butter in the recipe,
Indi Hampton says
Hmm I'm sorry to hear it didn't work for you. I'd love to hear what went wrong to help troubleshoot the problem!
J.D. Dallas says
I haven’t made yet, but is it possible to replace the peppermint with another flavor and what would you suggest? They look stunning, just not into peppermint.
Thank you
Indi Hampton says
Hi J.D.! I would just replace the peppermint extract with vanilla and they'll be delicious chocolate vanilla cookies.
Judy says
Or you can try almond extract. Your recipe might be better than mine which i made last year into button cookies (See: https://i.ibb.co/fvdg58B/button.jpg). However, there's an easier way to achieve marbelizing. Here's what i did: Form a choco log and roll plastic-wrap securely around it. Form a blonde log and roll plastic securely around it. Refrigerate both logs 30 min. Remove choco log from fridge. Divide in half or quarters. Roll out each half or quarter until its approx. an 8" snake. Remove blonde log from fridge and do the same thing. NEXT: Take one choco snake and one blonde snake. Attach (pinch) their tops to each other, then twist the snakes around each other, like a spiral, pinching-together the very end of the spiral. Then fold the spiral-snake so their ends meet. Then roll it into a log, approx. 12 inches long. Then once more, fold over the log, so the ends of the log meet. Then again roll it into a log (approx. 1.5-inch diameter. You can now slice 1/8" sample to check how marbelized it is, and whether to risk folding/rolling again. Repeat the above process with the remaining snakes. If they became too sticky to roll, put in fridge or freezer awhile. For each sliced-dough round, you can punch two holes at center of each round, using a jumbo straw to make "button-holes" (so that each cookie becomes a "button"), then once its baked, you pull jute twine thru the button-holes and tie a decorative bow.
Betsy says
Absolutely beautiful cookies, and easy to make.
I'd recommend halving the peppermint extract. The minty flavor was overpowering unless paired with a cup of hot chocolate.
Mary says
The ads on here are a bit much. There's an ad between every ingredient! Plus the pop ups. Hard to follow a recipe when you have to constantly dodge ads. I get you need sponsorship but THIS much?
Indi Hampton says
Uggh thank you for bringing this up-- I was not tracking that and they are absolutely absurd. I'm working with MV to take it down a notch, but in the meantime, I know if you print the recipe the ads won't print (even though in the preview it looks like they will). Thanks for your patience on this...
Sharon Merrill says
Hi Indi, I used your recipe as a base. Instead of the peppermint chocolate layer, I made a half batch of the vanilla recipe using freeze-dried tangerines and orange extract with orange gel food color to make an orange shortbread and made orange Creamsicle shortbread. The marbling turned out beautifully and the cookies were a huge hit. Thanks for the inspiration!
Indi Hampton says
Ohh my gosh that's such a fun idea!! Our 5 year old would freak out for Orange Creamsicle cookies! Thanks for sharing!